Showing posts with label Fortigate. Show all posts

Wednesday, August 13, 2014

[Guide] How to delete FortiGate log entries stored in memory or local disk


How to delete FortiGate log entries stored in memory or local disk.
It is assumed that memory or local disk logging is enabled on the FortiGate and other log options enabled (at Protection Profile level for example).
  • 1- Example to delete logs from local disk for only WEB Filtering entries (*):
FGT# execute log filter device 0

FGT# execute log filter category 3

FGT# execute log delete
This will delete webfilter log
Do you want to continue? (y/n) y
  • 2- Example to delete logs from memory for only WEB Filtering entries (*):
FGT# execute log filter device 1

FGT# execute log filter category 3

FGT# execute log delete
This will delete webfilter log
Do you want to continue? (y/n) y
  • 3- Example to delete all local logs ( memory and local disk ) :
FGT# execute log delete-all
This will delete all local logs
Do you want to continue? (y/n) y


(*)_Note : To get the device and category list, type the filter command without argument .

FGT# execute  log filter device
Available devices:
 0: disk
 1: memory
 2: faz
 4: fds

FGT# execute  log filter category
Available categories:
10: application control
 9: dlp
 6: content
 5: spam
 4: ids
 3: webfilter
 2: virus
 1: event
 0: traffic


Wednesday, July 2, 2014

FortiGate DHCP Advanced Options - Lease time configuration

To enable a DHCP server, go to System > Network > Interface. Edit the interface, and select Enable for the DHCP Server row. In here we can assign the address range, sub net mask, default gateway and dns server.

Now check the IP confugration settings. As shown in below figure, lease period is set to 7 days and we can only assign one DNS Server in above settings.

To change lease time and add more dns servers we have to do modify the configuration through CLI Console.
First enter below command line.
config system dhcp server
Type get to list all DHCP Servers. As shown in below figure I have 4 DHCP Servers.

Type edit <server entry number> and hit enter. And see the current DHCP Server configuration.

DHCP Server default lease-time is 604800 = 1 Week = 7 Days

So I am going to change the DHCP Lease-time to 1 Day = 86400 Seconds

Type below command set the lease-time
set lease-time 86400

To add another DNS Server (Alternative) type below command.
set dns-server2 <IP Address>

Type end to end the current session and see the DHCP configuration on the interface.

Do ipconfig /release and ipconfig /renew in computer's command prompt and verify the new IP Configuration.


Clear up all DHCP Addresses lease

Do follow the steps:
For advanced user, you may console into Fortigate Firewall, else;
Go to System -> Dashboard -> Status -> CLI Console,

Look for CLI Console on dashboard.

By using below this command to clear up all DHCP address lease in Fortigate.


Enter execute dhcp lease-clear in CLI console, then all dhcp leased addresses will clear up.


Friday, June 13, 2014

[HOW] Turn on Policy-Based IPSec in Fortigate in FortiOS 5

For FortiOS 5 and newer version:  (Policy-Based IPSec is disable)
There is no subtype under VPN policy type.

How to turn on Policy-Based IPsec
Go to System -> Config -> Features, turn on Policy-Based IPSec VPN and click Apply

Then under policy, policy subtype will be enable when VPN policy type is selected.


Tuesday, May 20, 2014

[HOW] Enable disk logging on a FortiGate in FortiOS 5

By default disk logging has been disabled on FortiOS v5.0. One of the reasons this was done is because the flash memory on some devices are not designed for constant read/writes, so saving logs to it can degrade the disk (resulting in corrupted sectors). Having said that, we've got a few FortiGates that have been logging to disk for a few years now with no problems.

Below are the steps to re-enable disk logging:
1. Confirm your device has a log disk
2. Format the log disk
3. Enable logging 

1. Confirm you device has a log disk

Firstly check that your FortiGate has the log disk available. Some units don't come with a log disk. To confirm use the get sys status command and ensure that the variable 'Log hard disk' shows 'Need format'.

fortigate # get sys status 
Version: FortiGate-VM64 v5.0,build0228,130809 (GA Patch 4)
Virus-DB: 16.00560(2012-10-19 08:31)
Extended DB: 1.00000(2012-10-17 15:46)
IPS-DB: 4.00345(2013-05-23 00:39)
IPS-ETDB: 0.00000(2000-00-00 00:00)
Serial-Number: FGVMEV0000000000
Botnet DB: 1.00000(2012-05-28 22:51)
License Status: Valid
Evaluation License Expires: Fri Nov  1 06:24:58 2013
VM Resources: 1 CPU/1 allowed, 475 MB RAM/1024 MB allowed
BIOS version: 04000002
Log hard disk: Need format
Hostname: fortigate
Operation Mode: NAT
Current virtual domain: root
Max number of virtual domains: 1
Virtual domains status: 1 in NAT mode, 0 in TP mode
Virtual domain configuration: disable
FIPS-CC mode: disable
Current HA mode: standalone
Branch point: 228
Release Version Information: GA Patch 4
FortiOS x86-64: Yes
System time: Wed Oct 30 15:43:01 2013

If your FortiGate doesn't have a hard disk you'll get the following:

fortigate # get sys status 
Version: FortiGate-VM64 v5.0,build0228,130809 (GA Patch 4)
Virus-DB: 16.00560(2012-10-19 08:31)
Extended DB: 1.00000(2012-10-17 15:46)
IPS-DB: 4.00345(2013-05-23 00:39)
IPS-ETDB: 0.00000(2000-00-00 00:00)
Serial-Number: FGVMEV0000000000
Botnet DB: 1.00000(2012-05-28 22:51)
License Status: Valid
Evaluation License Expires: Fri Nov  1 06:24:58 2013
VM Resources: 1 CPU/1 allowed, 475 MB RAM/1024 MB allowed
BIOS version: 04000002
Log hard disk: Not available
Hostname: fortigate
Operation Mode: NAT
Current virtual domain: root
Max number of virtual domains: 1
Virtual domains status: 1 in NAT mode, 0 in TP mode
Virtual domain configuration: disable
FIPS-CC mode: disable
Current HA mode: standalone
Branch point: 228
Release Version Information: GA Patch 4
FortiOS x86-64: Yes
System time: Wed Oct 30 15:43:01 2013

2. Format the log disk

Now enter the command execute formatlogdisk, then press y to confirm. This will format the disk then REBOOT the firewall.

fortigate # execute formatlogdisk 
Log disk is /dev/sdb1.
Formatting this storage will erase all data on it, including
  logs, quarantine files;
and require the unit to reboot.
Do you want to continue? (y/n)y

3. Enable logging

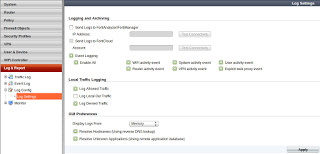
When the device is back up login to the web GUI and navigate to Log & Report > Log Config > Log Settings. You should now see the 'Disk' option. Select this (and 'Enable local reports' if you want to run reports locally) then click apply. Ensure that 'Display logs from' says Disk.

If you don't have this option via the web GUI you can enable it via the CLI with the following commands:

fortigate # config log disk setting
fortigate (setting) # set status enable
fortigate (setting) # end


Reference: 


Related Posts Plugin for WordPress, Blogger...