Showing posts with label SystemFile. Show all posts

Tuesday, October 30, 2012

[Fix] Windows blue screen after upgrade to XP SP3


Windows XP service pack 3 has been released for some times. But if you want to install it on your AMD based HP/Compaq computer, you probably will always faced the blue screen problem (BSoD, Blue Screen of Death).

HP had comes out with a solution. There are 5 steps to fix this problem:

1) Restart computer and press F8 key repeatedly until Windows Advanced Options Menu appears.
2) Choose Safe Mode.
3) Browse to C:\Windows\System32\Drivers.
4) Find a file named “intelppm.sys” and rename it to “XXXintelppm.syx“.
5) Restart.

The problem should be fixed and you will no longer get the same error message.

Reference: http://h10025.www1.hp.com/ewfrf/wc/document?cc=us&dlc=en&docname=c01457284&jumpid=reg_R1002_USEN&lc=en


Monday, October 8, 2012

[Fix] Window login as temporary profile


Sometimes Windows OS may not read your correct user profile properly, instead, load with temporary profile which will look completely different.  If you are not aware of temp profile or missed to see the pop-up message at bottom right side of the screen, then really you will be surprised to see completely different and new desktop without your files,folders,shortcut icons and any customized settings.This guide shows how to fix temporary profile issue on Windows.

Why Windows Loads with Temporary Profile?
Obviously, your profile (the files and folders located under C:\Users\user_name) is corrupted. There is another chance which is a delay in reading your profile files due to Antivirus scan or something else during boot up. Usually after typing your user name and password Windows tries to read and load your profile, if it gets corrupted or delay in reading, Windows will load with temp profile to give temporary access on computer.


How to Fix Windows Temp Issue on Workgroup and Domain Environment

Rename the temp profile registry and revert back the old registry settings for the correct profile.

Then, find out the temporary profile SID and rename the registry folder to .bak
How to know which is the correct profile SID?
You may check on ProfileImagePath binary data that allocated in the particular SID folder under ProfileList.

Next, log off and log in with your username and password. You will get a new profile with default icons and profile settings back.

IF you still login as Temporary profile, please follow the steps below to delete the corrupted profile:

  • Click Start, right-click Computer, and then click Properties.
  • Click Change settings.
  • In the System Properties dialog box, click the Advanced tab.
  • Under User Profiles, click Settings.
  • In the User Profiles dialog box, select the profile that you want to delete, click Delete, and then click OK.
  • Click Start , type regedit in the Start search box, and then press ENTER.
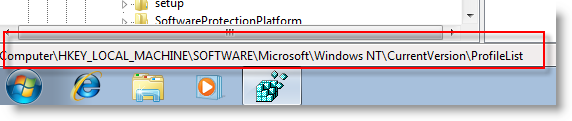
  • Locate and then expand the following registry subkey: HKEY_LOCAL_MACHINE\SOFTWARE\Microsoft\Windows NT\CurrentVersion\ProfileList
  • Right-click the SID that you want to remove, and then click Delete.
  • Sign in to the computer and create a new profile.
Try to login again. Hope you get back correct profile =)

NOTE:


Please backup the data in the profile if you really need to delete away the profile by using the steps above.
Data such as:


  • My Documents (Music, videos and downloads)
  • Desktop
  • Favorites
  • Any outlook PST files


Reference:
http://social.technet.microsoft.com/wiki/contents/articles/3571.microsoft-windows-user-profiles-service-event-1511.aspx
http://www.sysprobs.com/fix-temporary-profile-windows-7
http://support.microsoft.com/kb/947242
http://windows.microsoft.com/en-US/Windows7/Fix-a-corrupted-user-profile


Sunday, September 2, 2012

HyperTerminal in Windows 7 (32 or 64-bit)


Frustrated on looking for HyperTerminal in Window 7?
Ya, this is one of the big complaints about Windows 7.
So here is how to get HyperTerminal on to Windows 7 (32 or 64-bit).


On the Windows 7, make a new folder named as "Hyper Terminal" under C:\Program Files or C:\Program Files (x86)
From a Windows XP, copy the following files to the folder that was just created on the Windows 7:
C:\Program Files\Windows NT\hypertrm.exe
C:\WINODWS\system32\hypertrm.dll
C:\Windows\System32\hticons.dll
C:\Program Files\Windows NT\htrn_jis.dll
C:\WINODWS\Help\hypertrm.chm
C:\WINDOWS\Help\hypertrm.hlp


Now just run hypertrm.exe and HyperTerminal is on Windows 7.

If you want to have HyperTerminal on your Start Menu just create a shortcut to hypertrm.exe and put it in C:\ProgramData\Microsoft\Windows\Start Menu\Programs and when you go to All Programs under the Start Menu, HyperTerminal will be there.

If you didn't copy C:\Windows\System32\hticons.dll into the particular folder, there will be no icons shown when creating a connection. However that is a non issue.


A quick side note if you have problems getting your USB to Serial connection working under Windows 7 try getting drivers from http://www.prolific.com.tw/eng/downloads.asp?ID=31.The PL2303_Prolific_DriverInstaller_v10518.zip worked great for me.


You can download the files you need from this link:
HyperTerminal.rar which are contain all the files.
If you want download separate file, may choose from Separate File

NOTE: These 2 DLLs should be included for full functionality, that most of the sites with articles about this neglect to mention.
C:\Program Files\Windows NT\htrn_jis.dll
C:\Windows\System32\hticons.dll
And if you want the help files, they are:
C:\WINDOWS\Help\hypertrm.chm
C:\WINDOWS\Help\hypertrm.hlp
Hope this helps...

You can also download PuTTY and use that as a replacement to HyperTerminal and has better tools built in.
http://www.chiark.greenend.org.uk/~sgtatham/putty/download.html


Friday, August 17, 2012

The location of NK2 file of MS Outlook

Sometime we are really frustrated by looking on NK2 file which store all the email address that we had used for past... maybe few month? year? or century? are you kidding, guys....

Anyway, the location of the NK2 AutoCompelete file created by Outlook might be different from one computer to another, depending on the operating system and the version of Outlook.


Here's the rules for finding the location of your NK2 file:

For Outlook 2003/2007 with Windows 2000, Windows XP, or Windows Server 2003: 
The location of the nk2 file is C:\Documents and Settings\[User Profile]\Application Data\Microsoft\Outlook 
The name of the NK2 file is identical to the Outlook profile name, with .nk2 extension.

For Outlook 2003/2007 with Windows Vista, Windows 7, or Windows server 2008: 
The location of the nk2 file is C:\Users\[User Profile]\AppData\Roaming\Microsoft\Outlook
The name of the NK2 file is identical to the Outlook profile name, with .nk2 extension.

For Outlook 2010 with Windows Vista, Windows 7, or Windows server 2008: 
The nk2 file is located in C:\Users\[User Profile]\AppData\Local\Microsoft\Outlook\RoamCache 
The name of the NK2 file is in the following format: Stream_Autocomplete_X_AAAAAAAAAAAAAAAAAAAAAAAAAAAAAAAA.dat

The X is the file index (usually 0) and AAAAAAAAAAAAAAAAAAAAAAAAAAAAAAAA is a random 16-byte key in hexadecimal format.

For Outlook 2010 with Windows XP: 
The nk2 file is located in C:\Documents and Settings\[User Profile]\Local Settings\Application Data\Microsoft\Outlook\RoamCache 
The name of the NK2 file is in the following format: Stream_Autocomplete_X_AAAAAAAAAAAAAAAAAAAAAAAAAAAAAAAA.dat

The X is the file index (usually 0) and AAAAAAAAAAAAAAAAAAAAAAAAAAAAAAAA is a random 16-byte key in hexadecimal format.

When you use the NK2Edit utility, you don't have to worry about locating the NK2 filename, because NK2Edit automatically open the default NK2 file for you.


Reference: http://www.nirsoft.net/utils/nk2_file_location.html

Friday, August 10, 2012

[Solved] SearchFilterHost.exe - Application Error


What if you saw on these error message...
 
SearchFilterHost.exe – Application Error The instruction at “0x7c9109fb” referenced memory at “0x00000004″. The memory could not be “read”.
Click on OK to terminate the program.

SearchFilterHost.exe – Application Error The instruction at “0x070609c” referenced memory at “0x00000014″. The memory could not be “read”.
Click on OK to terminate the program.

Microsoft visual c++ runtime library” Runtime Error! Program: C:\WINDOWS\system32\SearchFilterHost.exe. This application has requested the Runtime to terminate it in an unusual way. Please contact the application’s support for more information.

Example with photo:

Here is the solution:

Method 1: Enable Windows Auto Updates.
To enable Windows Auto Updates can help you efficiently repair searchfilterhost.exe error through updating the problematic searchfilterhost.exe file:
1) Click Start, go to Control Panel.
2) Enable the Windows Update utility.
3) Follow the instruction to install AxtiveX and click “Install” to install Windows Update utility.
4) Install all of the updates.
5) Restart PC to confirm the modification.

Method 2: Restore searchfilterhost.exe file from Windows Installation CD.
Due to the fact that searchfilterhost.exe file is a crucial system process that can be installed automatically when the system is installed on the PC, you may consider restoring it from Windows Installation CD once you have found any problems occur to it.
1). Insert the Windows installation CD.
2). Click Start, and then got to Run
3). Type expand cd Drive: \i386\searchfilterhost.exe_c:\windows\system32\searchfilterhost.exe
4). Press the “Enter” button.
5). Restart your computer to confirm this modification.

Method 3: Wipe out damaged Windows Update Files.
1). Click Start, and then go to Run. Once the command prompt windows pops up, type “net stop WuAuServ” onto it and press Enter button.
2). Type “cd %windir%” onto the command prompt window, and press Enter button.
3). From the latest popped- up folder, type ”ren SoftwareDistribution SD_BACKUP”, and press Enter to rename the SoftwareDistribution Folder.
4). Type “net start WuAuServ” onto the command prompt to restart the Windows Update Service.
5). Exit the command prompt.

Method 4: Re- register associated .dll files of searchfilterhost.exe.
In order to fix searchfilterhost.exe error, you may consider trying to re- registering the associated .dll files of searchfilterhost.exe if they haven’t been damaged by any undesirable activity or compromised by malware. You can follow the easy instructions to re- register Wdsshell.dll.dll:
For Windows XP user:
1) Click Start, and then click Run.
2) Type cmd onto the latest dialog box and press Enter button to enable Command Prompt utility.
3) Type regsvr32 wdsshell.dll
or
regsvr32 C:\WINDOWS\system32\wdsshell.dll onto the Command Prompt window as soon as it pops up.
4) Press Enter to confirm the modification.

For Windows 7 user:
1) Click Windows or Start if you are using Classic theme.
2) Type cmd onto the latest search box above Windows menu.
3) As soon as the Command Prompt appears on the screen, type regsvr32 wdsshell.dll

or
regsvr32 C:\WINDOWS\system32\wdsshell.dll
4) Press Enter.

Method 5: Replace it with a compatible one from cyber space.
1) Download the compatible version of searchfilterhost.exe from network.
2) Save it onto a hard disk. And then go to the folder C:\WINDOWS\system32.
3) Locate the problematic version of searchfilterhost.exe on your computer.
4) Rename the current version of searchfilterhost.exe with a name you like.
5) Copy & paste the compatible version into the folder C:\WINDOWS\system32.
6) Click Start and then head to Run.
7) Type cmd onto the latest pop- up and press Enter button to go into the Command mode. (In Windows 7, type cmd onto the latest search box above Windows menu.)
8) Type “regsvr32 searchfilterhost.exe” onto Command Prompt and then press “Enter” button.

Method 6: the last and the most useful method
What if you really no need the latest window search update, can just uninstall the latest version on it.
and It will solve your problem =)
Uninstall from the Programs.

All the best to you ^-^

Reference:
http://www.pcerrorfixtip.com/fix-searchfilterhost-exe-error-how-to-repair-searchfilterhost-exe-error-effectively/
http://www.bleepingcomputer.com/forums/topic405287.html

Monday, July 30, 2012

Solved: missing or corrupted of Windows\System32\Config

If you get the error as below:

Step:
1) Insert the Windows XP bootable CD into the computer. When prompted to press any key to boot from the CD, press any key.
2) Once in the Windows XP setup menu press the "R" key to repair Windows.
3) Log into your Windows installation by pressing the "1" key and pressing enter.
4) You will then be prompted for your administrator password, enter that password. Or else may just leave blank.
5) Go to this directory: 


6) Be safe, we change the file extension of original system file, before we fix the error


7) In the below example we are copying these files from the \windows\repair\ directory, as below:


8) Once both of these files have been successfully copied, remove the CD from the computer and reboot.
9) Restart the computer, Problem is solved.

What if you have other system file corrupted,
you may also follow this steps to fix your problem.

Example:
software system file :-

sam system file :-

security system file :-

default system file :-


Good Luck to everyone. ^-^


Tuesday, May 22, 2012

[FIX] BOOTMGR is missing!!

You may get this error while booting your computer, when this error message shown is indicate that the boot sector is damaged or missing.

In this cases, you may need a Window installation disk as we need to boot into Window Recovery Environment (WinRE).


Method 1: Startup Repair from the Windows Recovery Environment (WinRE)
====================================================
1. Insert the Windows Vista installation disc into the disc drive, and then start the computer.
2. Press a key when the message indicating "Press any key to boot from CD or DVD …". appears.
3. Select a language, a time and currency, and a keyboard or input method, and then click Next.
4. Click Repair your computer.
5. In the System Recovery Options dialog box, choose the drive of your Windows installation and click Next.
6. At the System Recovery Options Dialog Box, click on Repair your computer.
7. Click the operating system that you want to repair, and then click Next.
8. In the System Recovery Options dialog box, click Startup Repair.


Method 2: Fix or Rebuild BCD
=====================
1. Put the Windows Vista installation disc in the disc drive, and then start the computer.
2. Press a key when the message indicating "Press any key to boot from CD or DVD …". appears.
3. Select a language, a time, a currency, and a keyboard or another input method, and then click Next.
4. Click Repair your computer.
5. Click the operating system that you want to repair, and then click Next.
6. In the System Recovery Options dialog box, click Command Prompt.
7. Type bootrec /fixboot, and the press ENTER
8. Reboot machine, check whether it is successful to boot into Window.

What if doesn't work, please follow the steps below to recreate BOOTMGR system file.

1. Follow method 2, until Step7
2. Type command as below
 
3. After finish all this command, may close the command prompt and reboot your machine.


Thursday, May 17, 2012

[How] Remove printer driver completely!!

Have you thinking of completely remove printer driver after you have tried a lot various of printer driver in a single laptop?
Or you facing some printer issue that need to remove it completely?

Come here, the guide will just help you well! =)

Firstly, go to run and open Microsoft Management Console as below.

Second, you will see this screen pop out and go to File - select Add/Remove snap-in

Third, just select Print Management add from left panel to right panel.

After you click on Add button, then you will see this, just click on Add the Local Server, then it will be same with previous snapshot.

Next, you will see your snap-in similar as below, then go to Print Management - Print Servers - Local Server - Drivers

Finally, select the driver packages that you want to delete and It will no longer exist and forever deleted from your local machine.

Thank you. =)

Resource:


Thursday, May 10, 2012

[How] Get back Desktop Wallpaper from Old Profile

Have you struggler about how to get back the desktop wallpaper from your old profile if you don't know where is your actual picture is?

Do your user / customer want you get back the wallpaper from their old profile when doing profile migration or setup new profile?

Friends,
Here is a clue for you all.

In Win7, you may get the wallpaper from below this path:


In Themes folder, you will see a picture file named TranscodedWallpaper.jpg. Copy and paste into same folder location in new profile, and must be the same filename as TranscodedWallpaper.jpg.

Then logoff and login again, you will see the wallpaper changed. =)

Note: 
1) The folder or file might be hidden, please changing file attributes or view file option solved the problem
2) If there is ACCESS_DENIED event, please do check user permission. Better do it by using administrator account


Wednesday, May 9, 2012

How to reset domain administrator password

I have tested with this hack, able to use in Window server 2008 and Window Server 2008 R2 domain controller.
It is really helpful what if you have forgot your domain administrator password.

Here is the steps:


  1. Boot onto DVD of Windows Server 2008
  2. Choose “Repair your computer”
  3. Launch cmd
  4. Go to c:\windows\system32
  5. Rename Utilman.exe to Utilman.exe.bak
  6. Copy cmd.exe to Utilman.exe
  7. Reboot on Windows
  8. Do the keyboard shortcut Windows + U when on the logon screen
  9. net user administrator Newpass123 inside the cmd
  10. log on with the domain admin account and this new pass
  11. change the password to remember it if needed
  12. Reboot on the DVD to put back the original Utilman.exe
May also watch this video.


Resource:


Monday, April 23, 2012

How to re-create the Show desktop icon on the Quick Launch toolbar

To re-create the Show desktop icon by yourself, you may follow these method:


Method 1: Manually re-create the Show Desktop Icon
  1. Click Start, click Run, type notepad in the Open box, and then click OK.
  2. Carefully copy and then paste the following text into the Notepad window: 
  3. On the File menu, click Save As, and then save the file to your desktop as "Show desktop.scf" (with quotes, in order to prevent Notepad from appending .txt extension) The Show desktop icon is created on your desktop.
  4. Click and then drag the Show desktop icon to your Quick Launch toolbar.


Method 2: Using the Regsvr32 command
  1. Click Start, Run and type the following command:
  2. The Show Desktop icon file should be available now.


Method 3: Copy the file from another user account

Every user account will have a copy of Show Desktop.scf file. Search for the file named Show Desktop.scf in your computer by logging in as administrator. Copy it to your user profile path here:

(Type the above path in Start, Run dialog)


Friday, April 20, 2012

[Solved] one or more activex controls could not be displayed


Problem is shown as below


Step:
1) Go to HKEY_CURRENT_USER\Software\Microsoft\Windows\CurrentVersion\Internet Settings\Zones\
2) Then u will see some folder under Zones


3) In Zones folder, you may see other folder name with pseudo-graphic number “L” that is out of numeric order.
4) You can just delete the file that is before zone number 0
5) Problem is solved.

**NOTE: Play safe, please backup your registry file before you make any action.

Reference Link:
1) http://social.technet.microsoft.com/Forums/en/w7itprosecurity/thread/90c3202c-448b-42b7-acf7-dab8dba7b000
2) http://blogs.technet.com/b/asiasupp/archive/2011/01/27/quot-one-or-more-activex-controls-could-not-be-displayed-quot-error-when-you-open-mmc-extended-tab.aspx


Thursday, April 19, 2012

[Solved] NTLDR is missing


Step:
1) Insert the Windows XP bootable CD into the computer. When prompted to press any key to boot from the CD, press any key.
2) Once in the Windows XP setup menu press the "R" key to repair Windows.
3) Log into your Windows installation by pressing the "1" key and pressing enter.
4) You will then be prompted for your administrator password, enter that password. Or else may just leave blank.
5) Copy the below two files to the root directory of the primary hard disk.
  • In the below example we are copying these files from the CD-ROM drive letter, which in this case is "e." This letter may be different on your computer.
6) Once both of these files have been successfully copied, remove the CD from the computer and reboot.
7) Restart the computer.


Tuesday, April 17, 2012

Solution: Windows\System32\Hal.dll is missing


Symptoms:
You will get the following error messages when attempting to boot into window xp
- Invalid boot.ini
- Window could not start because the following file is missing or corrupt: Windows\System32\Hal.dll

Solution:- To correct the Boot.ini file entries
1. Insert Window XP cd and start your computer and press any key when you see the message – “Press any key to boot from CD”
2. After the setup files are finished loaded, press R to repair using Recovery Console.
3. When in the recovery console, select the installation to log on to (usually number 1), and press enter
4. Enter administrator password, leave blank if there is no password
5. Type bootcfg /rebuild, and press enter
6. When the Windows installation is located, the following instructions are displayed:


7. Now you may restart your computer and load into OS.


Reference:
http://support.microsoft.com/kb/314477
http://www.proposedsolution.com/solutions/error-invalid-boot-ini-or-missing-windowssystem32hal-dll/


Related Posts Plugin for WordPress, Blogger...