May configure through console cable or Ethernet cable, however please plug into correct port and use correct method access into IOS command line console.
To configure Cisco IOS DHCP, follow these steps, which include sample commands:
- Configure an IP address on the router's Ethernet port, and bring up the interface. (On an existing router, you would have already done this.)
- Create a DHCP IP address pool for the IP addresses you want to use.
- Specify the network and subnet for the addresses you want to use from the pool.
- Specify the DNS domain name for the clients.
- Specify the primary and secondary DNS servers.
- Specify the default router (i.e., default gateway).
- Specify the lease duration for the addresses you're using from the pool. (i.e: 7days and 12hours / half day)
- Exit Pool Configuration Mode.
For example, let's say that you've decided that all IP addresses up to .100 will be for static IP devices such as servers and printers. All IP addresses above .100 will be available in the pool for DHCP clients.
Here's an example of how to exclude IP addresses .100 and below:
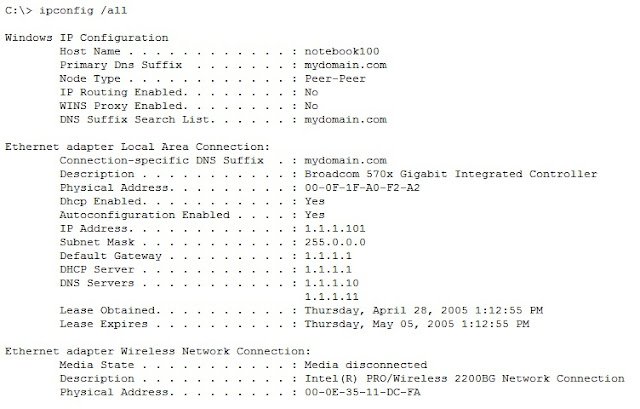
Then, enter the ipconfig /renew command on the laptop to receive an IP address. After you have the IP address, enter the ipconfig /all command.
This is the sample output:
May also refer to http://www.trainsignal.com/blog/cisco-dhcp if you are looking for DHCP relay or setup router as DHCP client
Reference:
http://www.techrepublic.com/article/configure-dhcp-on-a-cisco-router-or-switch/5690240
http://www.trainsignal.com/blog/cisco-dhcp


No comments:
Post a Comment